Norwegian Coffee Bread or Hvetekake
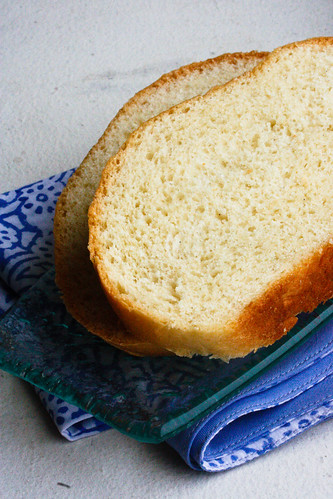
White bread, as we know, gets such a bad reputation. Especially the prepackaged cottony, light-as-air stuff that can be compressed into a ball the size of a can of tuna. But there is no reason light and cottony should be dismissed out of hand. For one thing, it's possible to make real bread with such an ethereal texture. It's the perfect bread for serving alongside coffee, topping with butter, sugar or jam, or traditionally with a Norwegian brown cheese called brunost. This is the kind of bread that gives easily, without an armature of crust that can make an open-faced treat messy and difficult.
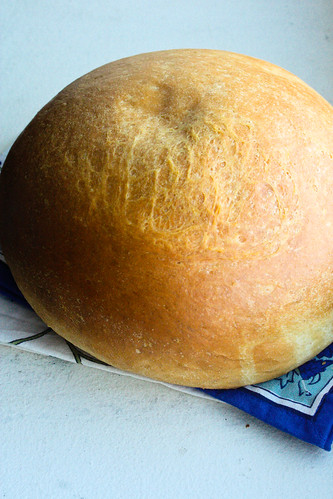
If you don't bake bread but want to, you should start here. It's so easy, requires only two rises, and the payout is not one, but two perfect loaves, one of which will only be dented on the top (as you can see mine was) if you drop it on its head while flipping it over to tap its bottom, checking for that hollow sound that indicates it's done. Luckily being dropped on its head never really hurt a loaf of bread (my sister might say that I am not so lucky).
Aside from being light and airy, this bread tastes of milk and cardamom, two of its main ingredients. A subtle sweetness, and a subtle spice (just like Norwegians, perhaps?). The day after I made it, after the first loaf had nearly been decimated, I got a text from my Norwegian husband claiming it to be the best bread ever. The recipe comes from Beatrice Ojakangas's The Great Scandinavian Baking Book, which, if you're interested in Scandinavian baking, is pretty much the gold standard here in the US, and the recipient of a James Beard award. And even though Ojakangas grew up in Minnesota (as so many Scandinavian-Americans do), and even though I, a native Coloradan made the loaves, R could only exclaim "We Scandinavians really know how to make bread."
A note about scalding milk: To scald milk, put it in a small pot over medium heat and bring it nearly to a boil, stirring the whole time so a skin doesn't form. Set aside and let it cool to lukewarm as indicated in this recipe. Evidently this is a practice commonly called for in older recipes in order to kill off bacteria in the milk. Since milk these days is pasteurized, it's usually no longer necessary. However, the website OChef cites the consummate expert Shirley Corriher who says that scalding milk before baking bread is still a good idea because there is a protein in milk that can somewhat reduce the rise of a bread. So what the heck, scalding doesn't exactly take long and it's not difficult anyway.
I'm send this bread to Yeastspotting.
Norwegian Coffeebread, or Hvetekake
Adopted from Beatrice Ojakangas's The Great Scandinavian Baking Book
2 packages active dry yeast
1/2 cups warm water (105F - 115F)
1 1/2 cups milk, scalded and cooled until lukewarm
1/4 cup sugar
1/2 teaspoon salt
1 teaspoon freshly ground cardamom
3 tablespoons melted butter
4 - 4 1/2 cups unbleached all-purpose flour
Extra melted butter for brushing on the loaves
Scald the milk (see note above) and set aside to cool to lukewarm. Dissolve the yeast in the warm water in the bowl of a standing mixer fitted with the paddle attachment. Let the yeast sit for 5 minutes so it can activate. Stir in the milk, sugar, salt, cardamom and melted butter on a low speed. (This all can also be done without a mixer, just stir the ingredients in by hand.)
Add 3 cups of flour to the mixture and increase the speed to medium. Beat until the mixture starts to get glossy, then add in one more cup of flour and stir for a few minutes more. Turn the mixer off and let the dough rest for 15 minutes while you switch to the dough hook. After the dough has rested, use the dough hook to knead the bread, adding in the last 1/2 cup of flour gradually until the dough comes together in a ball. Alternately, if you're kneading by hand, flour a clean surface with some of the rest of the flour and, well, knead by hand, adding in the rest of the 1/2 cup flour as you go. Kneading should take about 10 minutes, and the dough will be smooth and shiny.
Clean out and dry your mixer bowl, then oil it and place the dough back inside. Turn the dough over in the bowl so that the dough is oiled on all sides, cover the bowl with a kitchen towel and set aside in a warm place. Let the dough rise until doubled in size, which will take about 1 hour.
Once the dough has risen, divide it into two equal parts and shape each part into free-form round loaves. Place the loaves on two baking sheets covered in parchment paper, and set aside again in a warm place. Allow the loaves to rise until nearly doubled in size, about 45-50 minutes.
Preheat the oven to 375F. Brush the risen loaves with a little melted butter and bake for 30-35 minutes. The loaves will be golden and should sound hollow when tapped on the bottom (don't drop them on their heads!). Brush again with butter if you like, and cool on wire racks.


Comments
For More Information Visit Our Site: norton.com/setup